Learn how to generate an invoice in OneCrew, review invoice details, select billable items, confirm the Bill To contact, and review the invoice PDF before continuing.
The invoicing feature in OneCrew streamlines the billing process by automatically pulling Project details directly into a professional invoice document. This helps improve accuracy and save time when preparing invoices for customers.
This page explains how to confirm the Project is ready for invoicing, open the invoice tool, configure invoice details, confirm the Bill To contact, and review the generated invoice PDF.
Invoicing in OneCrew
Before You Start
Before an invoice can be generated, the Project must be in an Accepted status.
Navigate to the Project from the Active Projects list.
Check the Project status indicator at the top of the page.
If the Project shows Estimating or another status, change it to Accepted and confirm the prompts.
Invoices cannot be created for Projects that are still in the estimating phase.
Open the Invoice Tool
Once the Project status is confirmed as Accepted, OneCrew enables the invoicing tools.
Step 1
Open the Accepted Project
Open the Project that is ready to be invoiced.
Step 2
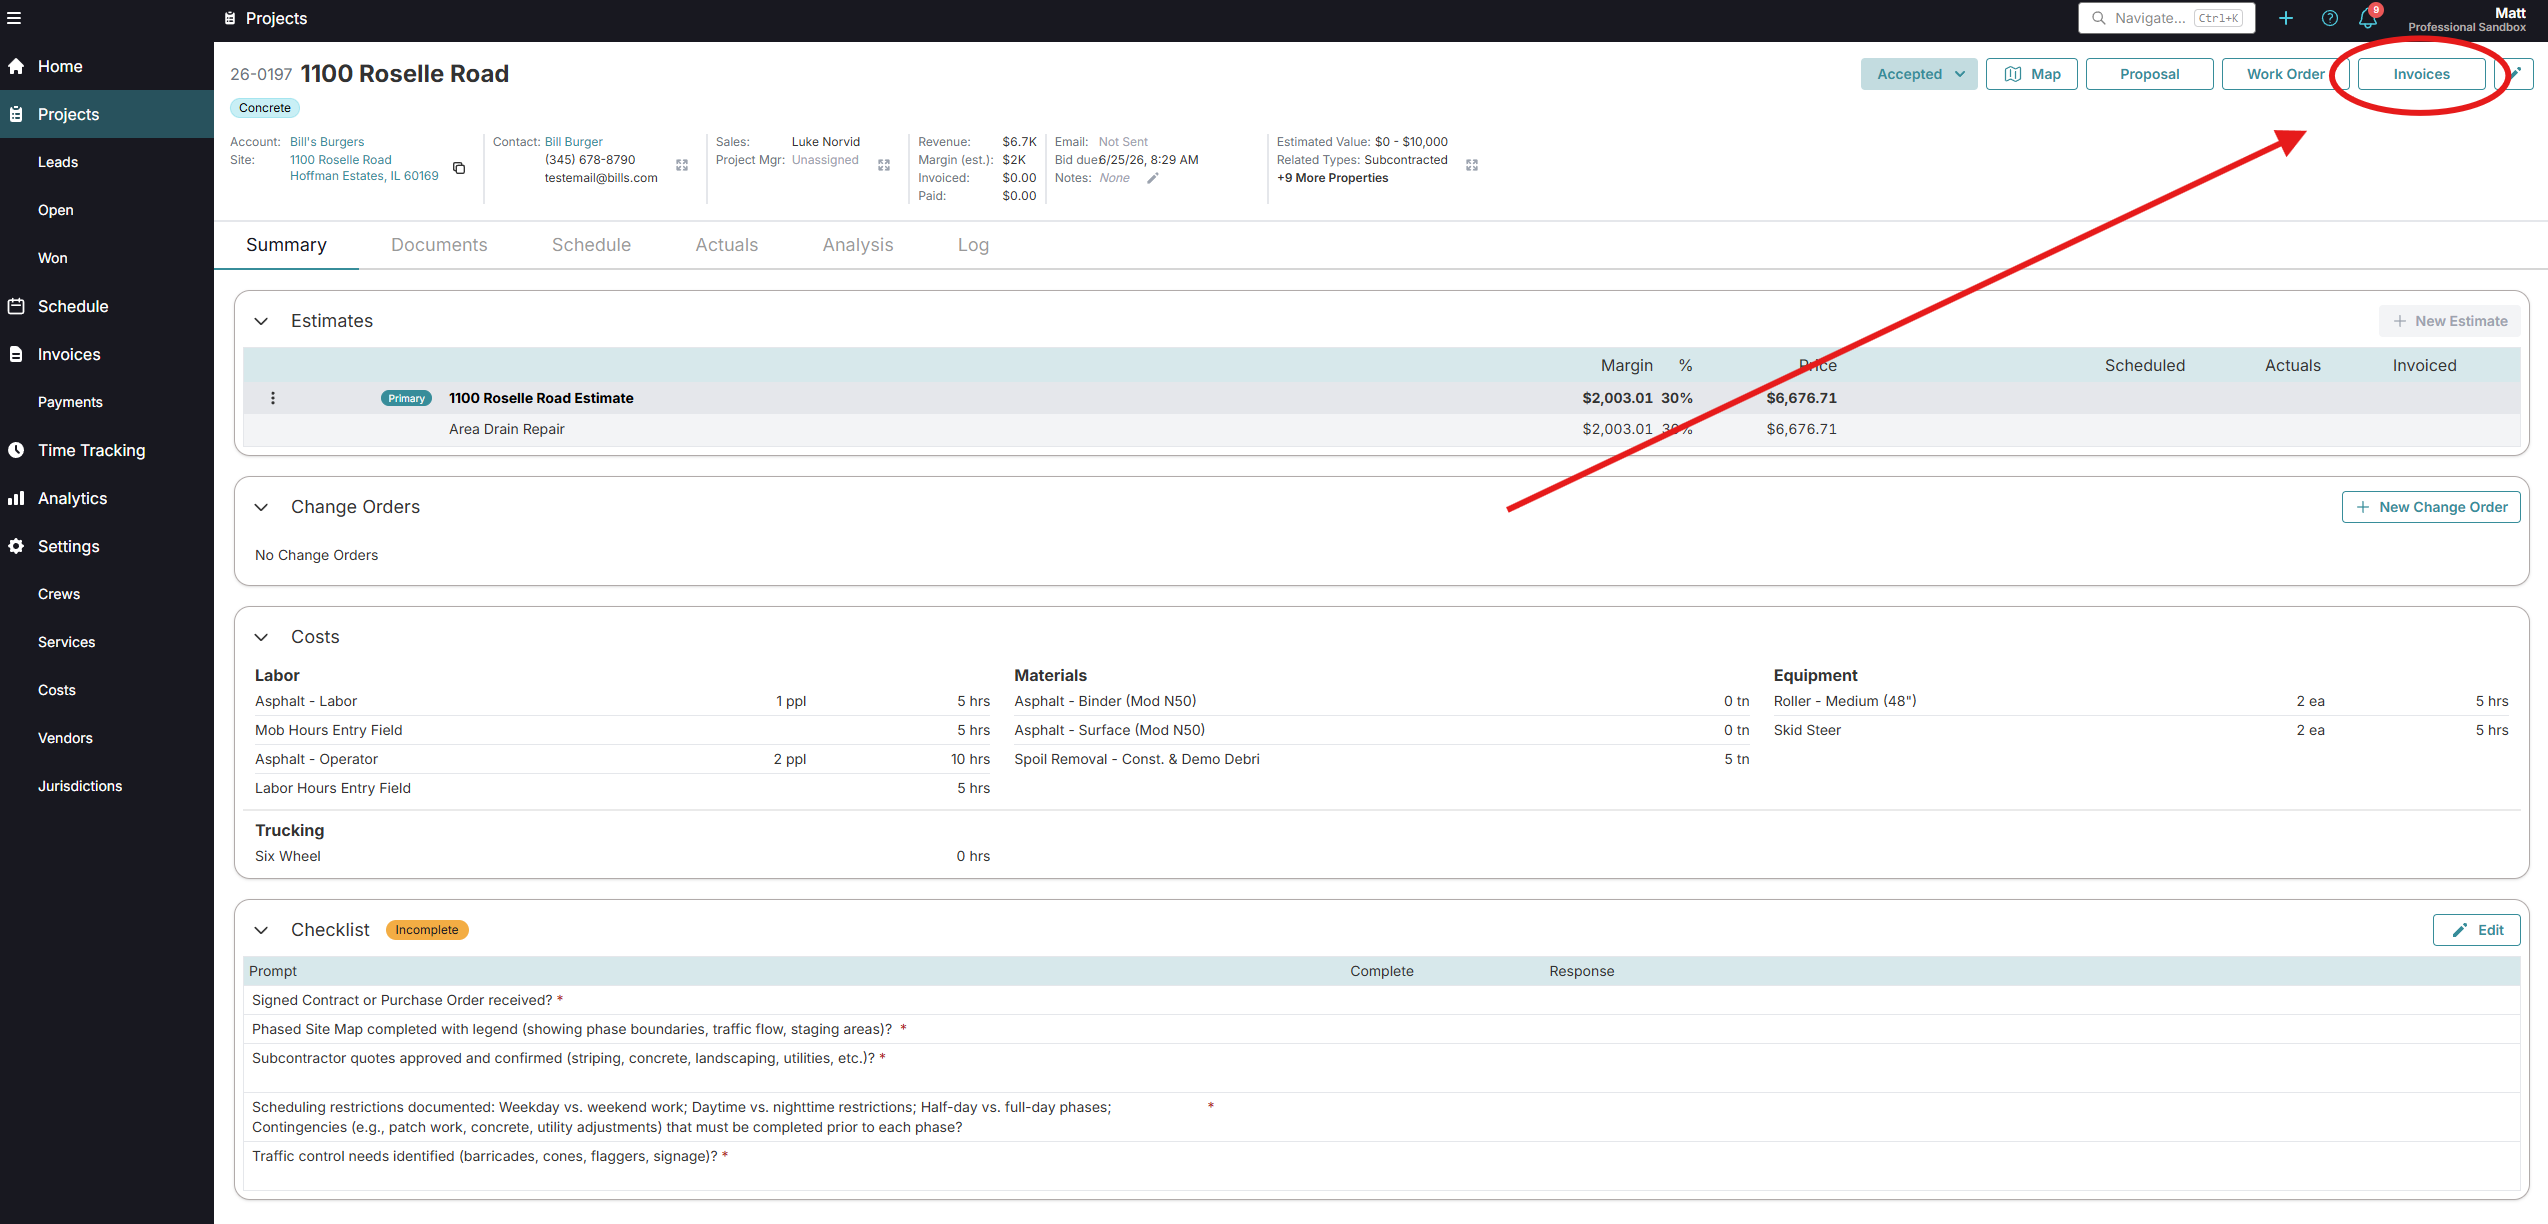
Select Invoices
Locate and click the Invoices button near the Proposal and Work Order buttons.
Step 3
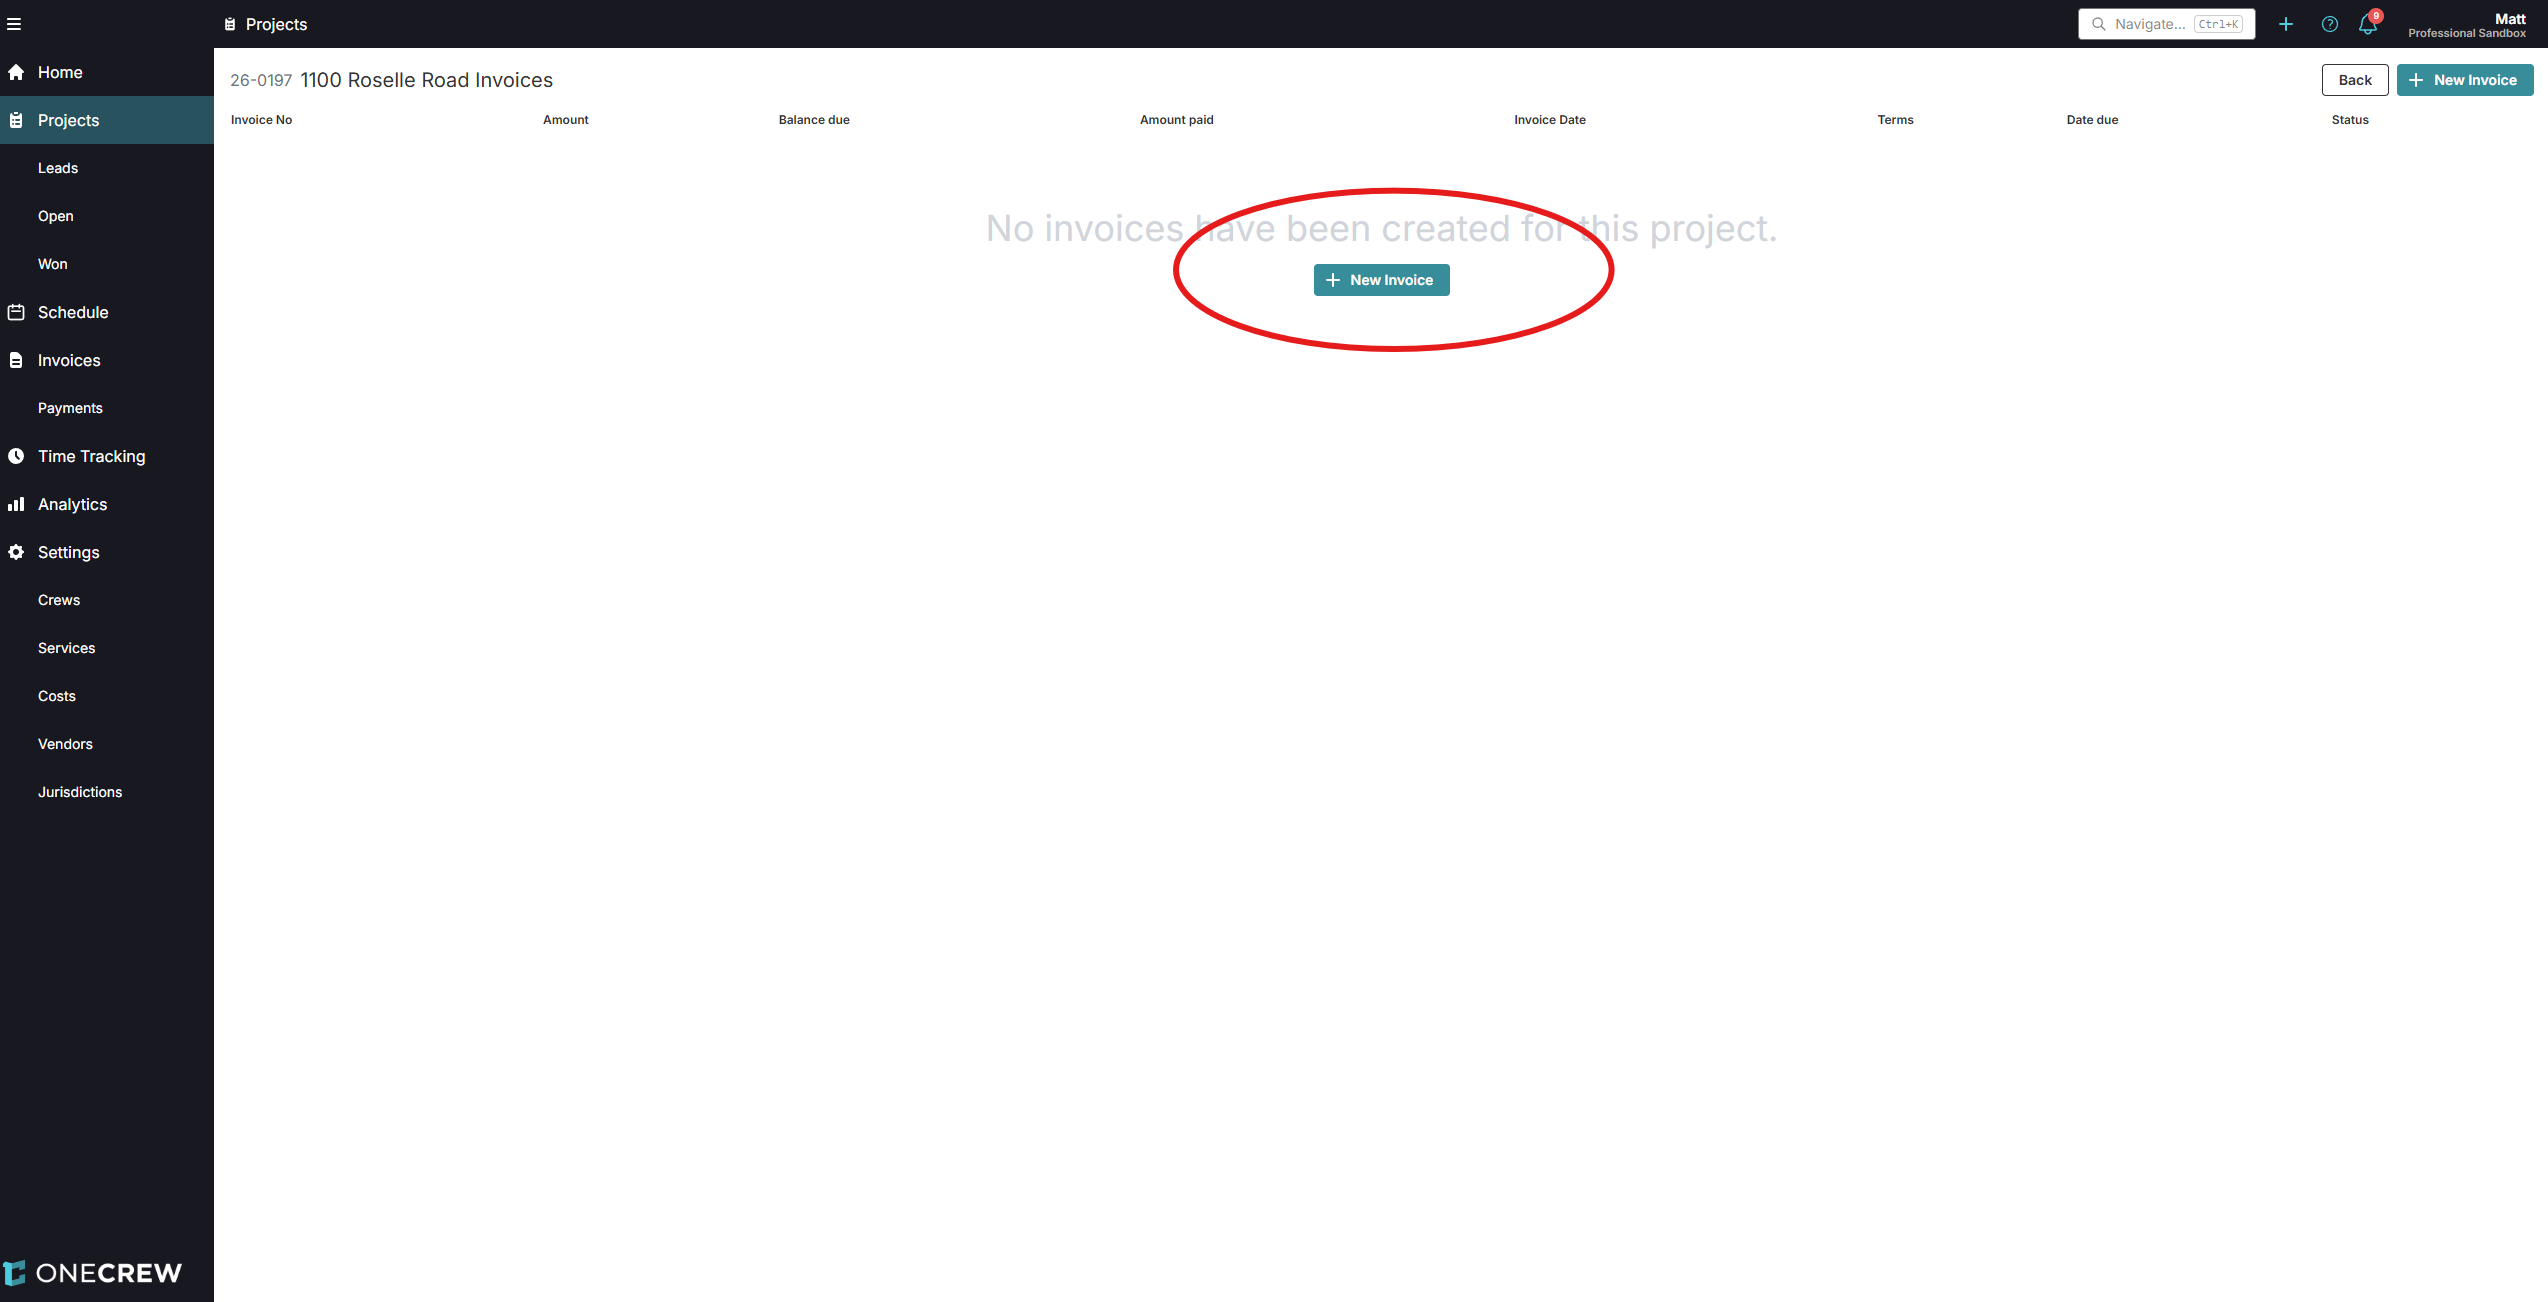
Select New Invoice
The Generate Invoice window will appear.
Step 4
Create New Invoice
Select the New Invoice button and fill in the details.
Configure Invoice Details
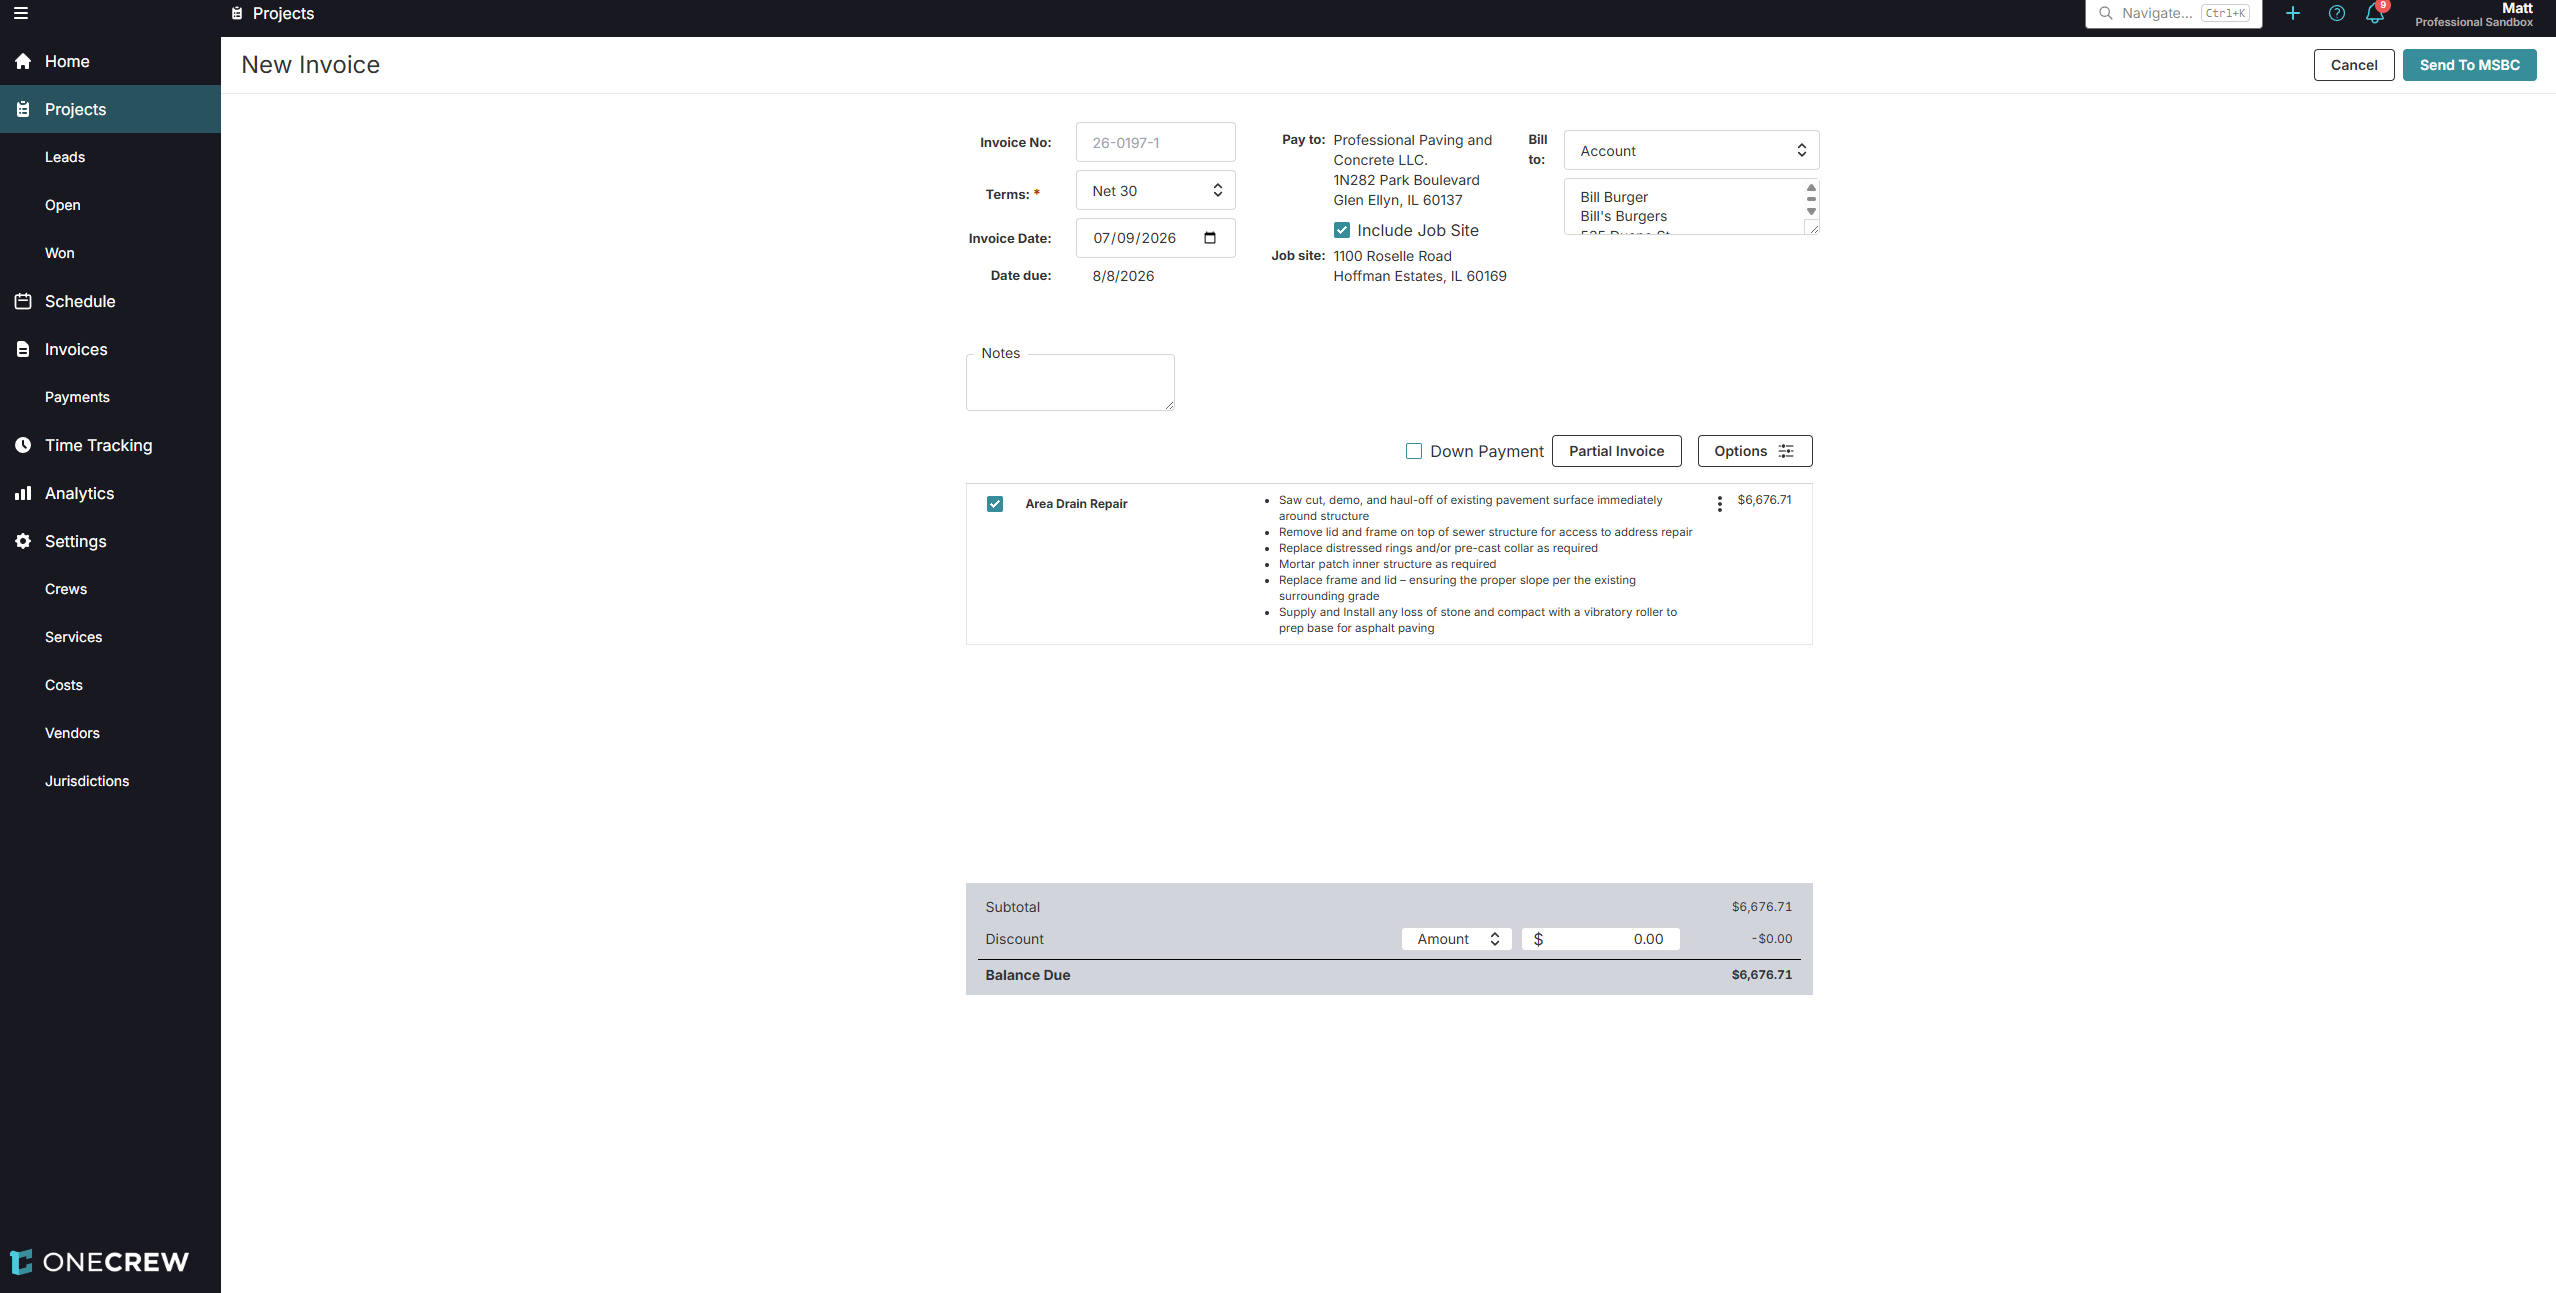
In the Generate Invoice window, review and configure the invoice information before generating the PDF.
Field
What to Review
Invoice No.
OneCrew suggests a default number based on the Project ID, such as 23-0092-1. This can be manually edited if your business unit requires a specific sequence.
Services & Change Orders
Review the list of Services and accepted Change Orders. Check the boxes for the specific items you want to bill for at this time.
Description
Descriptions default to the text used in the Proposal. To modify a line item, click the three-dot menu next to the Service and select Edit.
Notes
Use the Notes field to add customer-facing information, such as completion dates or specific job details.
Invoice Terms
Select the terms, such as Due on receipt or Net 30, from the dropdown menu. OneCrew will automatically calculate the Date due based on this selection.
Specify the Bill To Contact
By default, the invoice is addressed to the Project's Primary Contact. If the invoice needs to go to a different person or an Accounts Payable department, update the Billing Contact before generating the invoice.
Step 1
Return to the Project Details
Navigate back to the Project details page.
Step 2
Edit Contact Information
Click the pencil icon next to the contact information.
Step 3
Select the Billing Contact
In the Contacts modal, assign or select a specific Billing Contact.
Step 4
Save and Regenerate
Click Save. If you regenerate the invoice, it will now reflect the updated Bill To details.
This step is optional when the Primary Contact is also the correct Bill To contact.
Send the Invoice to MSBC
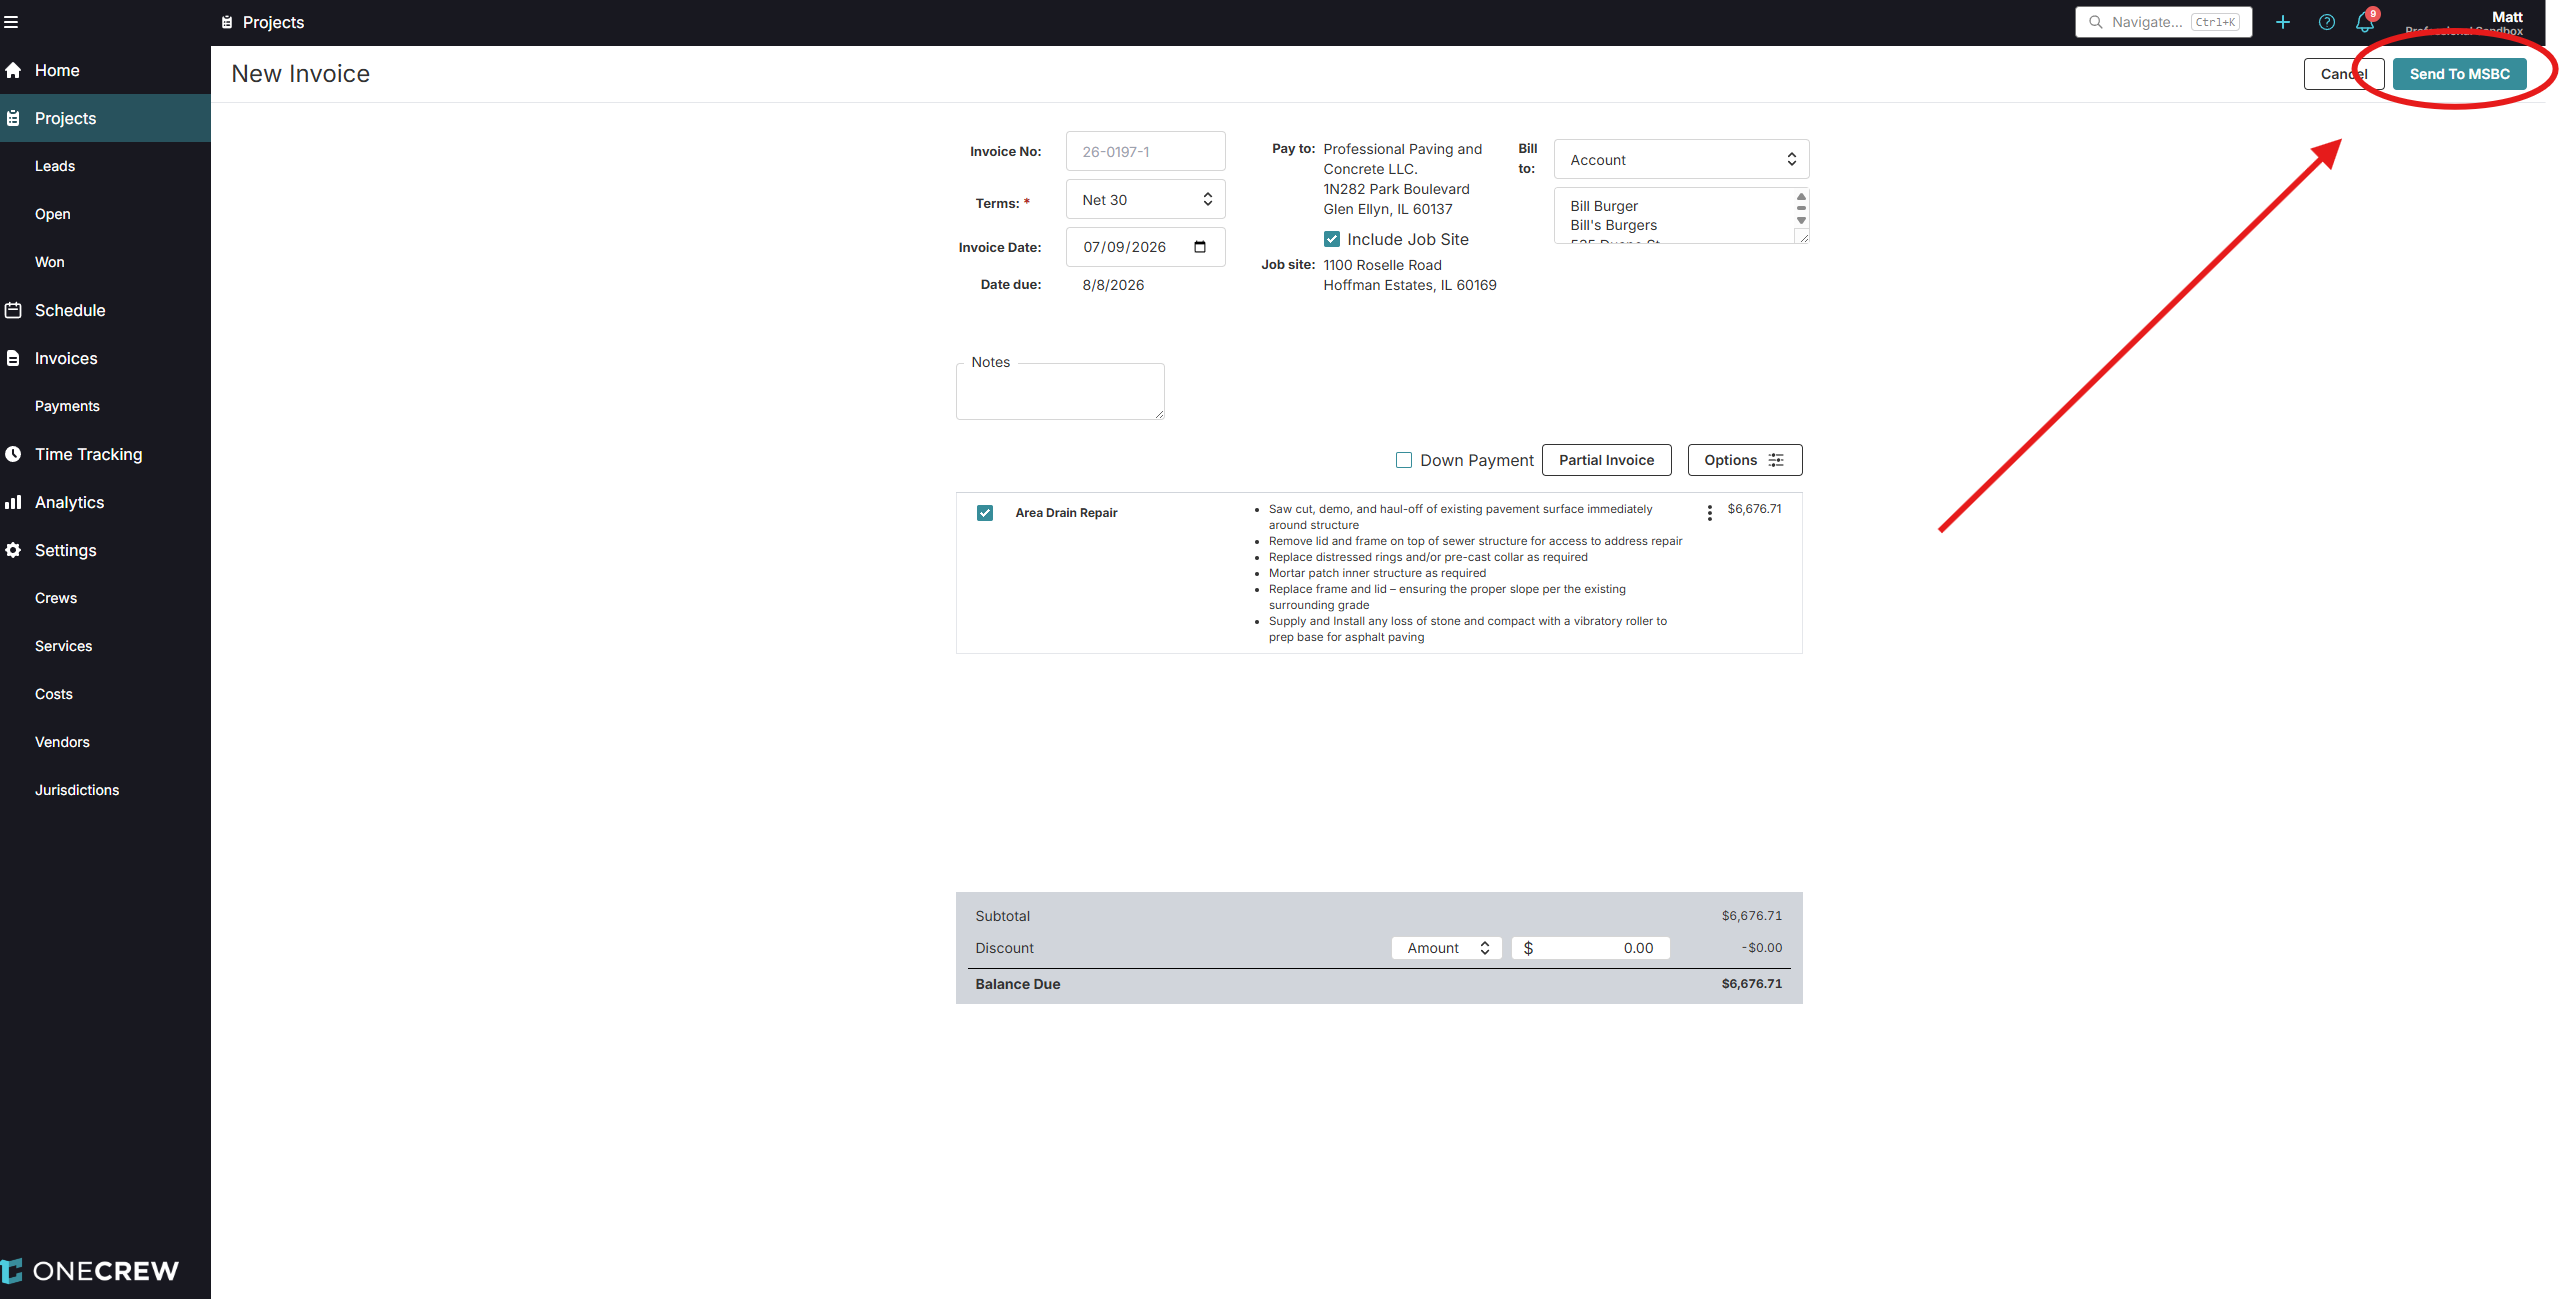
After finalizing the invoice configuration, click Send To MSBC.
Review the invoice carefully before it continues through the billing process.
Troubleshooting
Issue
Solution
Invoice Button is Missing or Greyed Out
Confirm the Project status is set to Accepted. Invoices cannot be created for Projects that are still in the estimating phase.
Incorrect Bill To Information
This occurs if no specific Billing Contact was set. Update the Project contact information, assign the correct Billing Contact, save the changes, and regenerate the invoice.
Next Step
After the invoice has been created and reviewed, continue to the next step in the invoicing or billing process based on your business unit's workflow.