All work in OneCrew starts with an Account. An Account represents the customer entity you are doing business with and serves as the foundation for everything that follows—Contacts, Sites, Projects, Estimates, Proposals, Scheduling, and Billing. Before creating anything else, you must first confirm that the correct Account exists.
Search for Existing Account
Always search first to avoid duplicates
Before creating a new Account, always search for an existing one. Many customers already exist in the system, and creating duplicates causes downstream issues with reporting, scheduling, and billing. Use the Navigate search to look for the company by name and review existing results carefully. Only create a new Account if you are confident it does not already exist. Once the Account is confirmed or created, you can then add Contacts and Sites that belong to it.
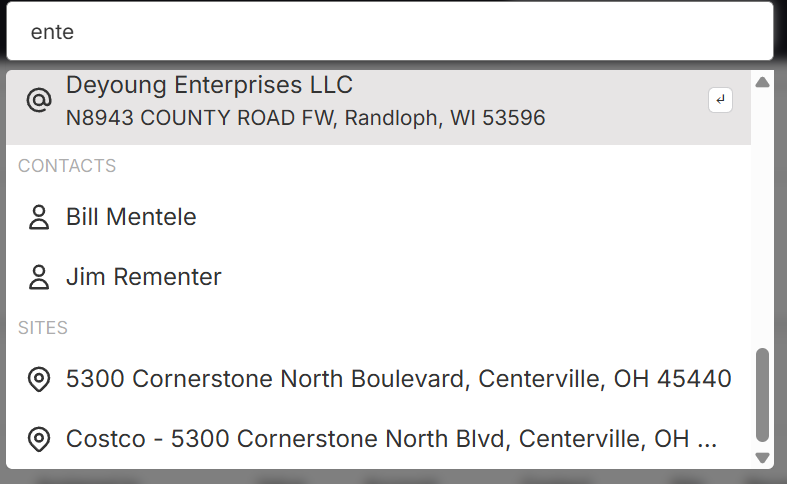
Click on the Navigate...🔍 search field in the page header and enter all or part of the company name
Review search results (icons help to indicate the record type):
If no record is found for your Account, proceed to create a new one.
Naming Standards
Before creating a new Account, Contact, or Site, use the approved OneCrew naming standards.
Consistent naming helps employees find the correct records, avoid duplicates, and understand
what each record represents.
Remember the basic record types:
Account = Who is the customer?
Site = Where is the location?
Project = What work are we performing?
For this page, pay special attention to Account and Site names:
Account names should use the full official legal business name and should
not include location details.
Site names should identify the physical location and include a clear Site type,
such as Office, Store, Facility, Warehouse, Yard, Plant, or Parking Lot.
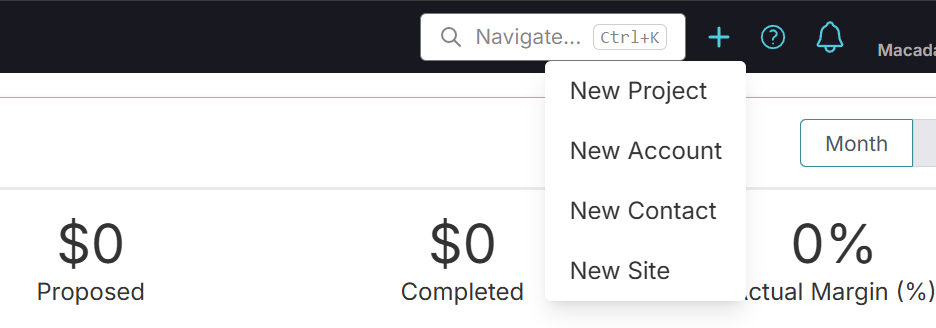
At the top of the page, click the blue plus (+) button (next to Navigate)
Select New account
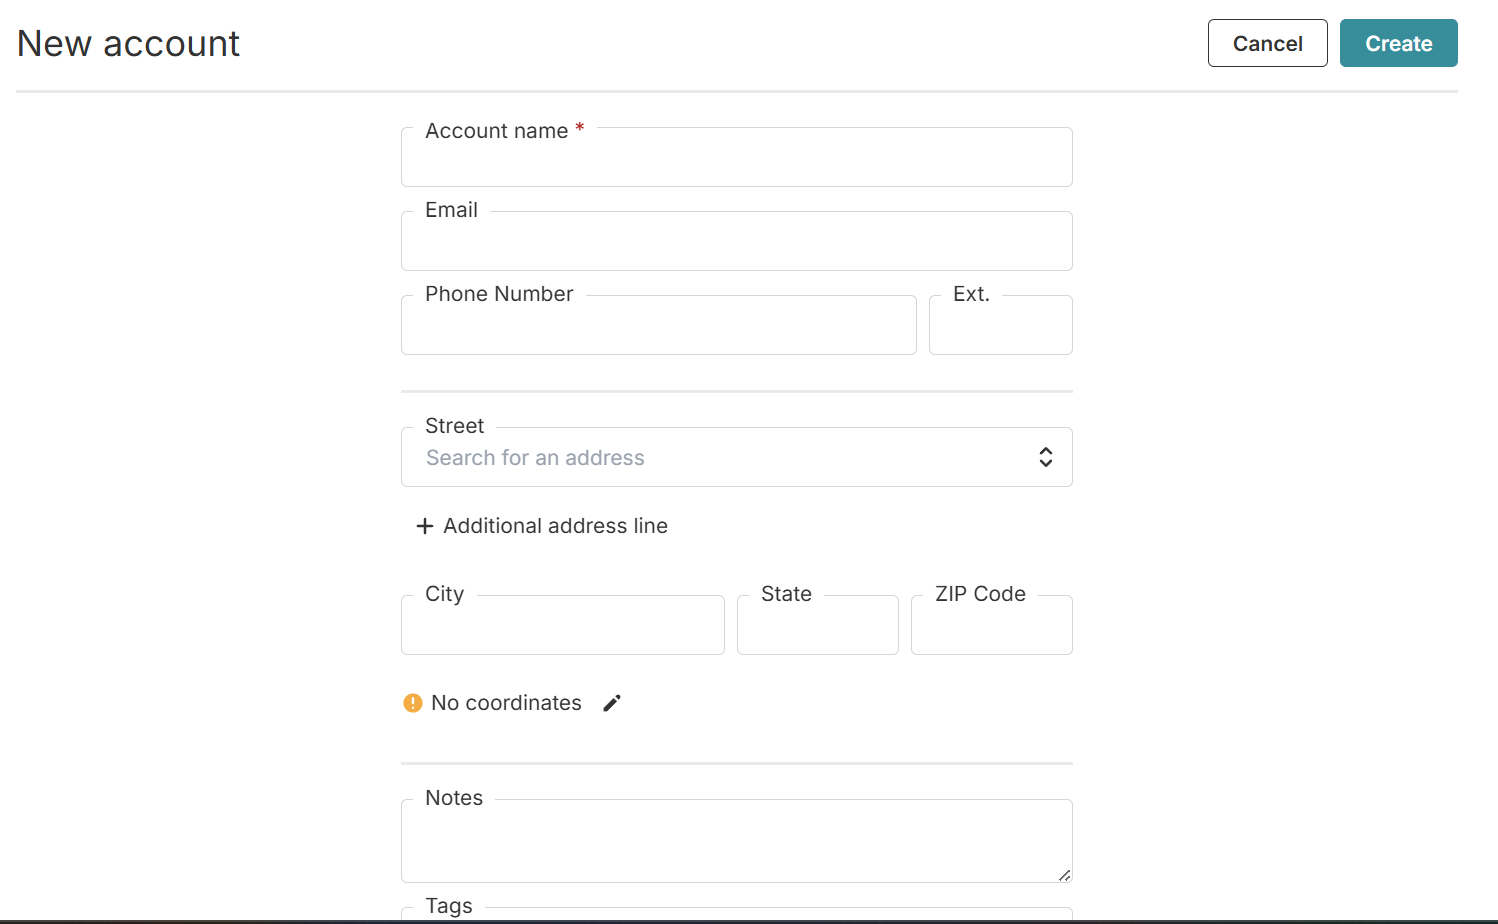
On the New account page, enter the following information:
Full Account name (Follow the naming conventions found in Appendix A5)
Primary Email address
Account’s main phone number (not an individual's number) NOTE: This is the address of the company, not necessarily the “Site” address where the work is being done.
Work address (begin typing your address, this field will auto-fill)
Any relevant notes about the Account.
Click Create to save the new record and to navigate to the account page where you can add new Contacts and Sites.
📌 While the only required field for creating a new Account is the Account name, this is not sufficient for maintaining a robust system of record. Please fill out the other fields on the New account page before clicking Create.
Adding a Contact
Once the Account record is created, add at least one Contact using one of the following options:
Preferred option: Create new Contact from the Account Page:
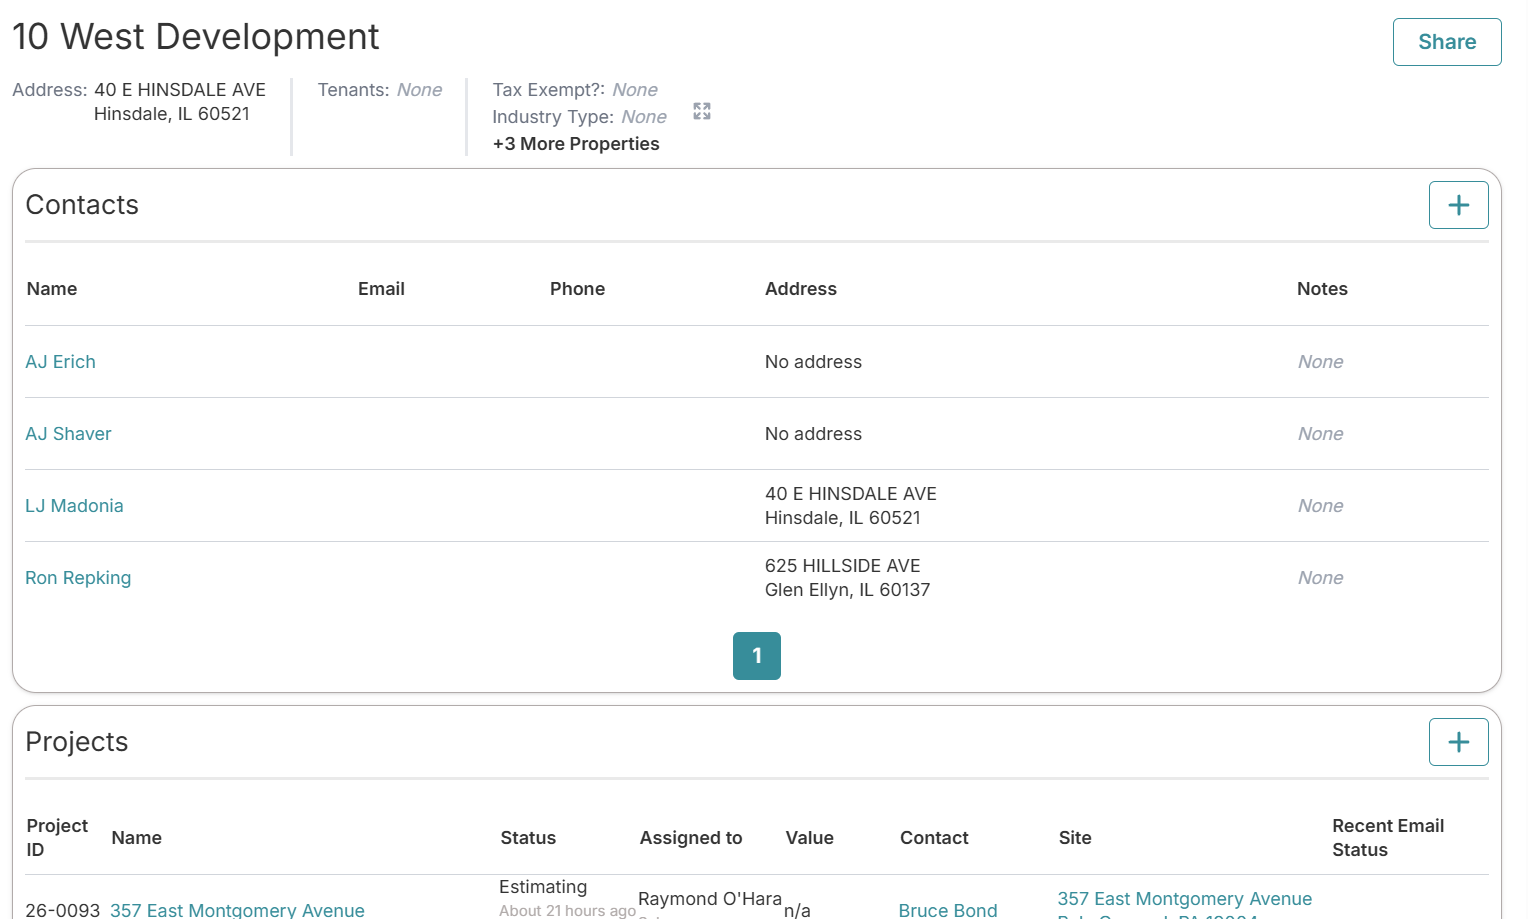
On the company's Account page, click the plus (+) button in the Contacts box. The Account field will automatically populate with the current company.
Alternative option: Create new Contact from the top navigation bar:
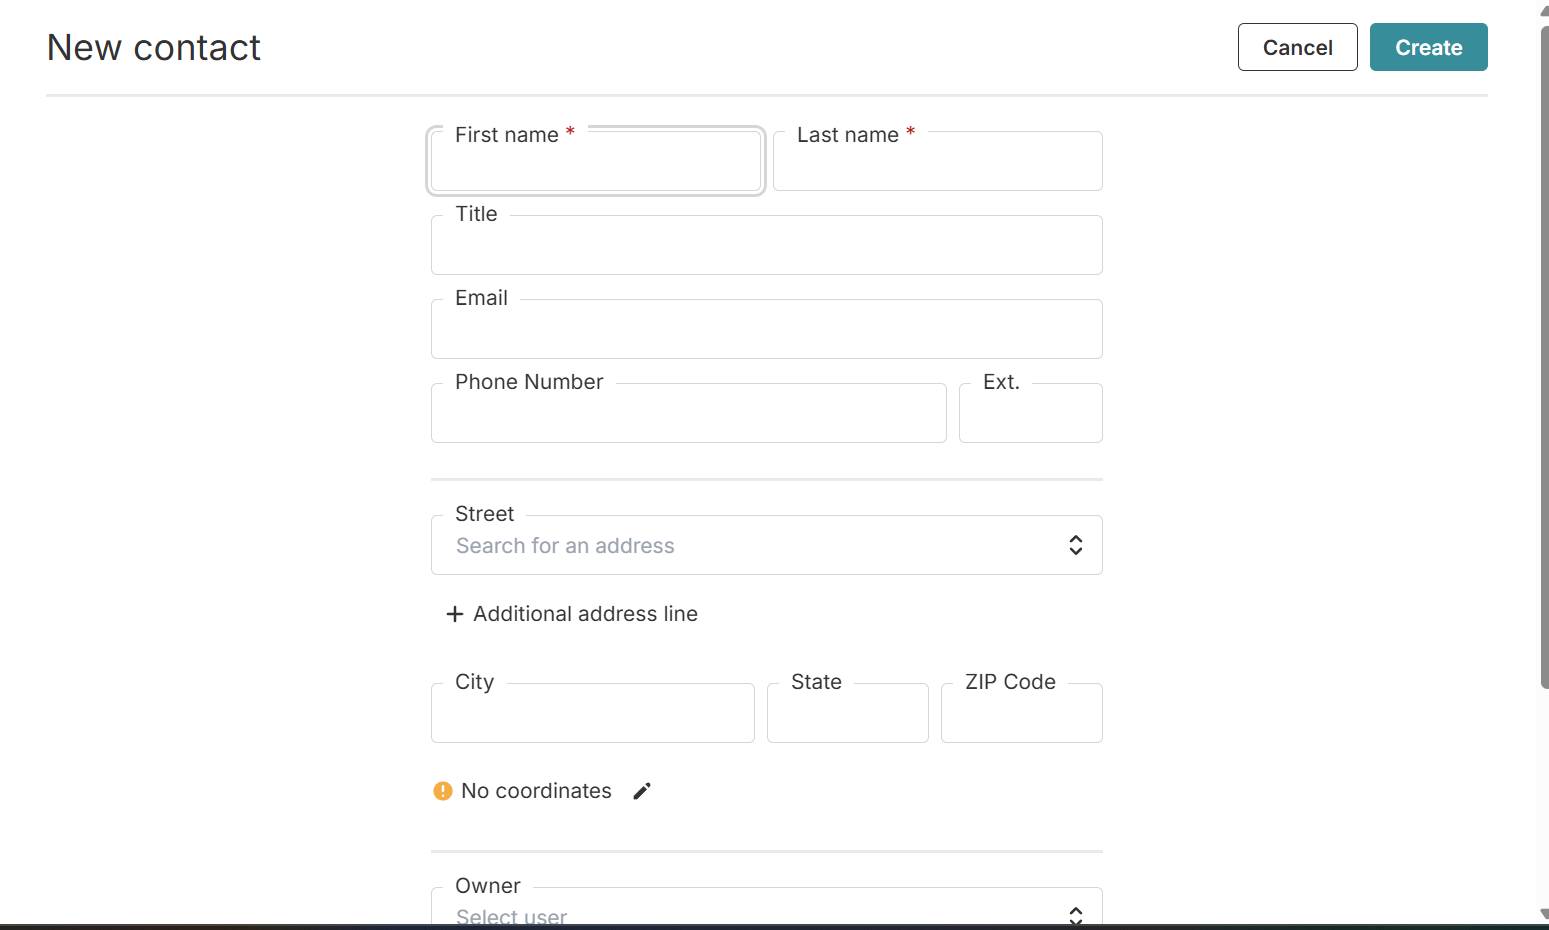
Click the blue plus (+) button (next to Navigate) and select New contact. You will have to select the Account at the bottom of the page.
Complete the Contact record:
Enter the person's details, including their title.
Even though Email is not required, please include it during your contact creation process.
For Owner enter in your name if you are the contact owner or the sales person who will own this contact.
When you create contacts from the Account page, the Account field at the bottom should automatically populate. If not, select the account appropriate for your contact.
Click Create
Adding a Site
There are multiple options for adding a Site in OneCrew. You should always check whether the Site already exists before attempting to create a new one.
📌 Each project Site must be attached to a company Account.
Use the ‘Navigate’ Bar to search for the Account for which you want to add a site.
Click on the Navigate...🔍 search field in the page header and enter all or part of Account for which you want to create a Site.
Select the appropriate Account in the results list to navigate to the Account page for the customer.
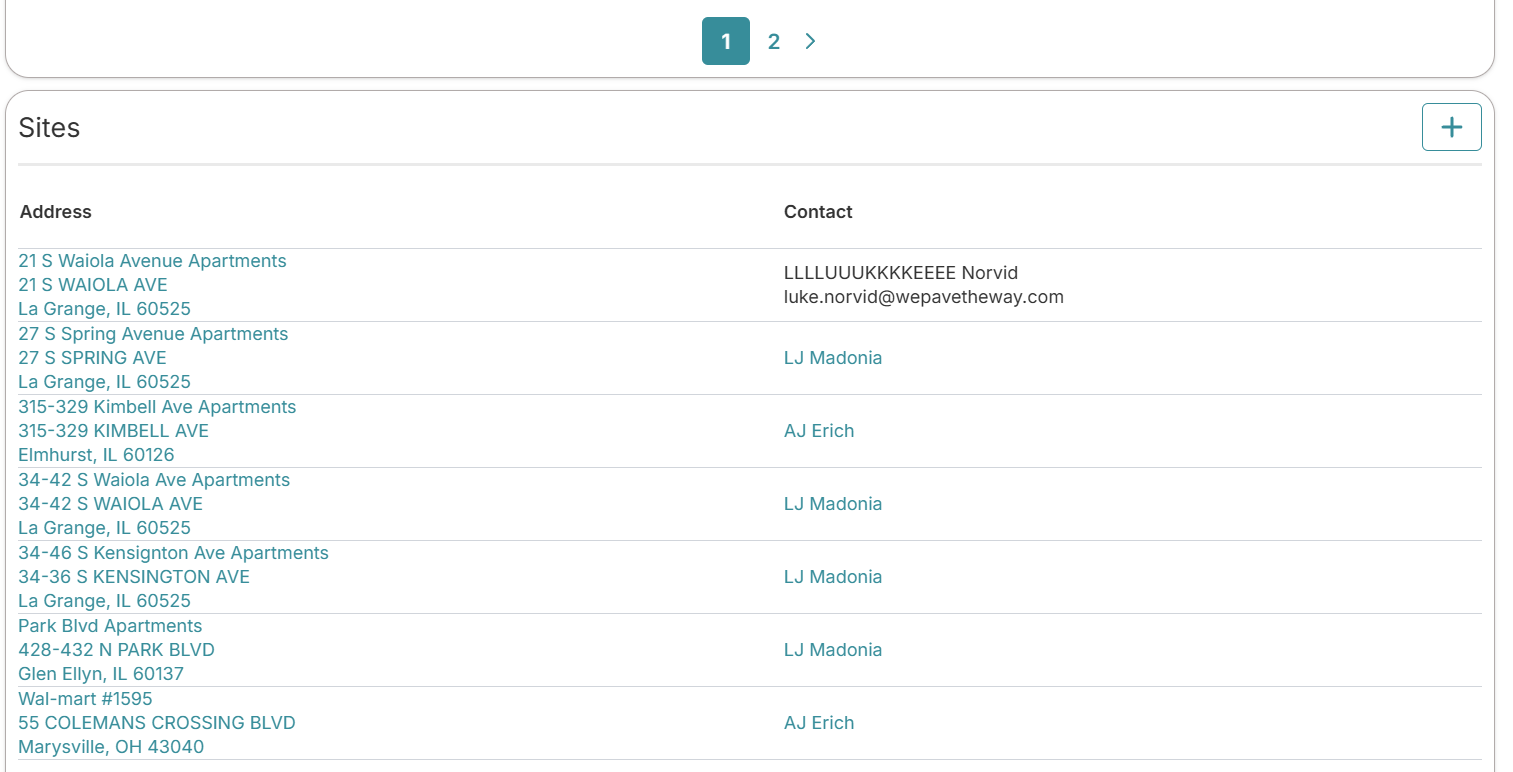
Click the plus (+) button in the Sites box to bring up the ‘New Site’ page.
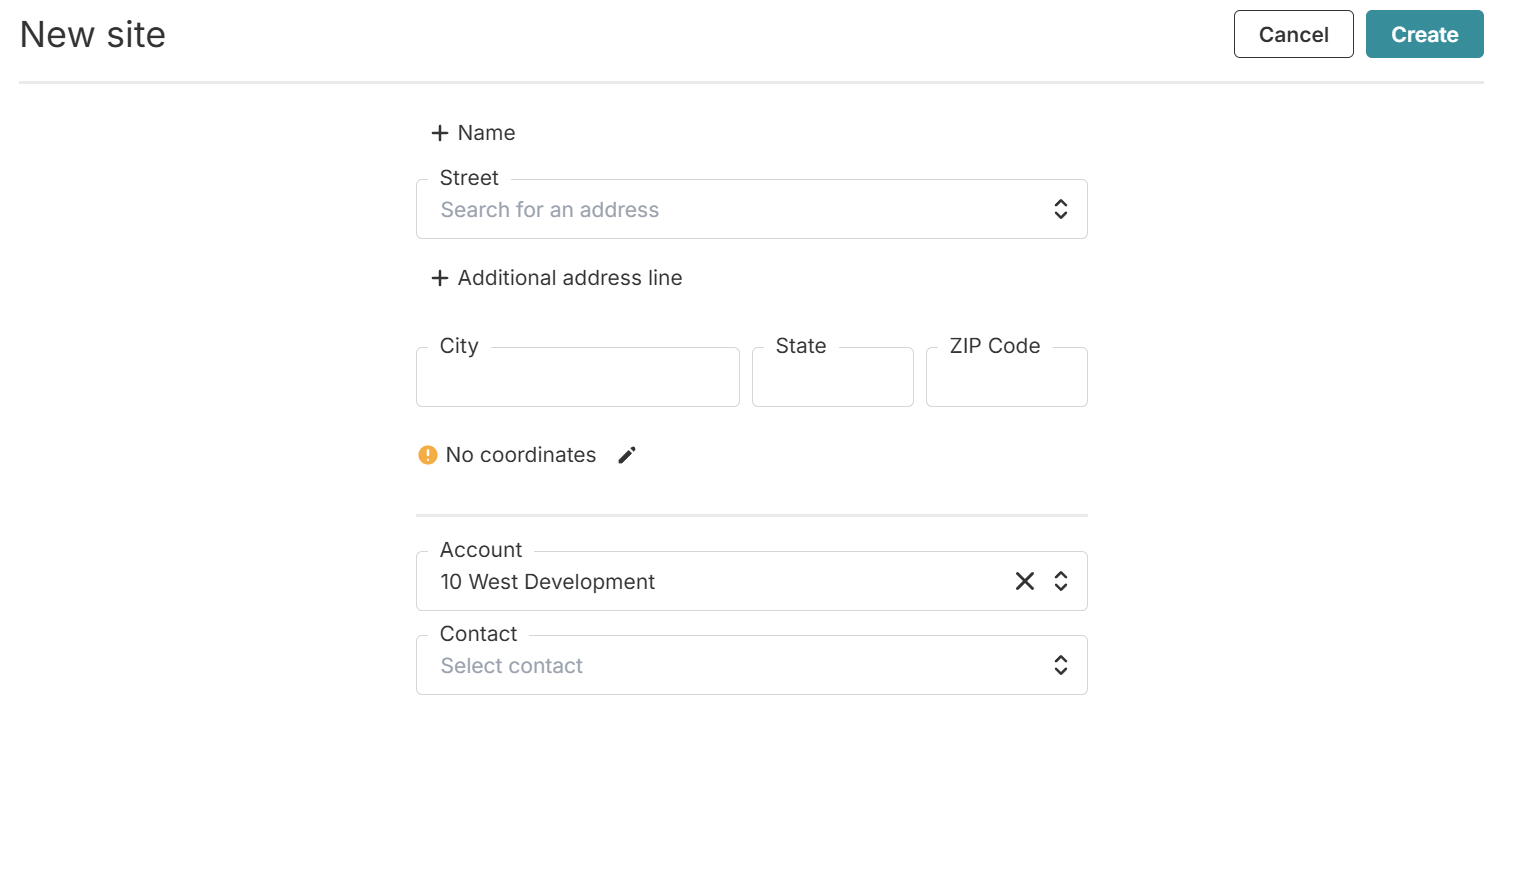
Enter Site Details:
Click + Name and enter the Site name (Follow the naming conventions found in Appendix A5)
Enter the address for your site, the rest of the address should appear in an auto-fill drop down. Click the correct address when it appears, and City, State, and ZIP Code will auto-fill.
Confirm or enter the Account if it isn't auto-filled
Select an on-site Contact if different from the main manager (optional). If you need a new Contact not available in the drop down, you must create one – see the section in this document for Adding a Contact.
Click Create
‼️ IMPORTANT: Be careful when looking up Sites and changing them to another Account. Some companies might come to us directly, but they also could come through a general contractor (GC) that we work with. This means both companies may have the same sites under their respective accounts. In this case, it is cleaner to enter the site in both companies rather than move them from one to the other. Properties are bought and sold, so ownership should be verified. Consider this when entering a new site.